If you would like to submit photography or photo restoration tips to this blog, please email me at KevinRetouch@gmail.com.

We will gladly provide a link to your website or blog along with your contribution.

Wednesday, September 12, 2012

How to find a photo restoration artist - revisited

Finding the right photo restoration artist online can be a little intimidating, so we decided to revisit the issue today.

Here’s a quick overview of what you need to consider when searching for the best photo restoration artist.

The first thing you want to consider is quality - the final results.

To check for the quality, you want to find an artist or company that offers several examples of restorations of varying degrees.  The more the better.

Here's why . . .

No two images are alike . . . just as no two images have exactly the same type of damage. Photos can be damaged by fading or fire or flooding. They can have scratches or chips or even missing pieces. You want an artist who is cable of restoring many types of damage, and you can only determine that by reviewing many "before and after" images.

With that said . . .

Compare ‘Before’ and ‘After’ photos carefully.

The quality and detail of the "after" image should be apparent to you. 

Do the colors look natural? How about the skin tone? The facial expressions? The hair?

In most cases, the colors should be deep and rich with naturalistic variations. Skin should have varying degrees of tone and texture. Facial expressions should look natural.

If the details and quality are not apparent, move on to the next web site.

Next, find out if the restoration artist or company is the one who will actually be working on your image or if they outsource their work to others. Although cheaper, outsourcing has many disadvantages, like communication problems, missed deadlines, or perhaps sub par work, not to mention the problem of sending our jobs overseas.

Once you are done with quality checks, look for costs, methods of payment, etc., to make sure you have a good fit.

Most service providers charge according to the severity of the damage, however some charge by the hour. Both are okay, but those charging by the hour might be costlier and may not offer a precise quote, nor does it mean the results will be better than those artists charging a flat fee based on severity of the damage.

A few final tips . . .

  • All companies should offer free estimates, with no hidden fees.

      •Work with an artist or company that offers a money-back guarantee.


      • Check to make sure they provide minor adjustments free of charge.


      • Confirm if the cost includes a print and shipping . . . or just the digital image only. Most people can now easily order prints themselves, either online or via a local lab, so why pay a service provider extra for prints and shipping costs if you can do it yourself for less?

Wednesday, March 21, 2012

Get your photography noticed online . . .

It’s the Greatest, Easiest, Most Profitable Way To Talk About Your Photography … So Why Aren’t You Doing It?


You’re standing in the checkout line, with several people in front of you. You glance over and start reading the titles of the magazines in front of you. And for some reason they just pull you in.
Do you really care who had an alien baby, or how you can create 365 looks that will make you look more sexy? Maybe … Maybe not.

Yet there is just something about those titles that make you want to pick up the magazine and start reading.

It isn’t a coincidence that the titles are that tantalizing. In fact I’m willing to bet more time is spent on creating those titles and cover layouts then they do writing the stories theselves.

What sells is the title – the sizzle – not the meat of the story. Yes, the story itself has to be good and give you exactly what the title promises. Yet the story satisfies your hunger for whatever information you were promised. You won’t move forward and take action once you’ve read the story.

Because editors know the only way they will stay in business is to get you to buy the magazine, they spend their time on what matters most. The titles.

Now lets convert that over into what you potentially do every week. If you blog, every week you sit down and come up with topics to write about. Yet how much time do you spend coming up with your titles? I know for a lot of you, the answer is “just a few seconds” – and that may even be pushing it.
I see post titles every day that are worded something like this:

Randy and Laurel’s Engagement

Elizabeth’s First Birthday

Jason and Kim’s Wedding Day

Yet what does this do for your business?

When your clients come over and visit your blog, they are a captive audience. They love what you do and chances are they are looking for their own images. I’m sure in the above example Randy and Laurel are thrilled to see their engagement images online, and are passing around the URL to all of their friends and family.

Yet how many people will ultimately see that page? Randy and Laurel – that’s two. Family and friends – we’ll add in another 20. And other clients that may come to the site and decide to look through their images – we’ll add another 50 for long term exposure. That’s 72 in total.

Yet what do these 72 people have in common? Not one of them found any excitement and desire to click on the title from any other method outside of the fact they knew Randy and Laurel. Or had a vested interest in looking at the images.

If you saw Randy and Laurel’s Engagement in Google, would you really click on it?

And more importantly, would you ever look in Google for Randy and Laurel’s Engagement in the first place?

Which means if you are trying to attract new clients, people that have never heard of you yet might want to find you, you have to start thinking like a magazine in the checkout lane. You have to pay attention to your titles and give people the things they are looking for.

How do you know what they are looking for?

The easiest way is head over to Google and use their keyword tool to do a little research.

Let’s get started by typing in the word “photography” just to see what comes up.


When you type in photography, you’ll get many different results. This will show you what people typed directly into Google last month using the keyword you’ve selected. It isn’t a comprehensive list, but should be a great starting point. It will show you search terms as well as worldwide and local results.

From there, you can further refine what keywords you wish to look at. For this example, lets choose the term “wedding photography”.


When you add those words to the search function, your results will come up based on the key phrase instead of one word. In this case everything will be centered around the phrase “wedding photography”. At this point, we’ll further refine our search and look up the term “beach wedding photography”.


After letting the results come up using this phrase, you can see a wide variety of options.


If you are in California, or have the desire to photograph weddings in California, you’ll notice 720 searches were made for “long beach wedding photography” and 390 searches were made for “newport beach wedding photography”.

So if you were showcasing “Jason and Kim’s Wedding” as a blog post title, you may attract a few dozen family and friends to the blog post.

But if you created a blog post title “How Jason and Kim Had Fun With Their Newport Beach

Wedding Photography”, do you think you could attract more attention from a variety of sources … including Google?

If you write hundreds of posts every year, you don’t have to (and shouldn’t) use the same titles over and over again just to attract Google’s attention. But if you think about it first and find a way to make it attractive to both Google and your readers, your posts could quickly help you build up the traffic to your site – and the profits to your business.

Source

Saturday, March 10, 2012

Image sharpening . . .

How to Sharpen Photo without Increasing Noise Visibility

Sometimes it happens that we need to sharpen photos for which there is noise, for example, pictures taken at night. But overall increase in photo sharpness increases and the noise visibility also. How to be in this situation? I can show you one method in Photoshop, how to avoid it.

First of all you should find some appropriate photo to work with.  I prefer to use this one. Open up this photo and start the tutorial. Go to Channel panel (Window > Channels). The first step is to look at the channels palette and determine which color channel best represents the area we want to capture. To the right, shown from top to bottom, you can see the red, blue, and green channels for this image. It’s obvious that the red channel contains the most information because it is most light. Click on the red channel and drag it down to the new channel button to create copy of it.

How to Sharpen Photo without Increasing Noise Visibility 01


We got the copy as you can se on the above picture. Then apply for copied channel Filter > Stylize > Glowing Edges with similar settings to these:


How to Sharpen Photo without Increasing Noise Visibility 02


Now we have effect like this:


How to Sharpen Photo without Increasing Noise Visibility 03


Hold the Ctrl button and click the Red copy thumbnail in the channels palette to load selection of this channel.


How to Sharpen Photo without Increasing Noise Visibility 04


After that we can delete this channel: click on the Red copy channel and drag it down to the delete current channel button to delete it. Then go to layers palette (Window > Layers) and press Ctrl+H to hide selection temporary, but donĂ¢€™t remove selection for now! It is important! Then apply Filter > Sharpen > Unsharp Mask with some suitable presets for the photo. Pay your attention that for each photo presets should be individual. I tried following presets:


How to Sharpen Photo without Increasing Noise Visibility 05


See the result now:


How to Sharpen Photo without Increasing Noise Visibility 06


Now, we have some selected area, but it is hidden for now, press Ctrl+H again to make it visible. Then press Ctrl+J to duplicate selected area to new layer. Then apply Filter > Sharpen > Sharpen Edges:


How to Sharpen Photo without Increasing Noise Visibility 07


That is it for now. We sharpened photo without increasing the noise visibility. Hope, you got some interesting knowledge from this tutorial.


How to Sharpen Photo without Increasing Noise Visibility 08

Source

Thursday, March 1, 2012

Improving your portraits . . .

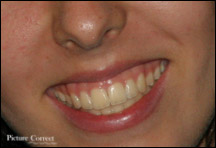
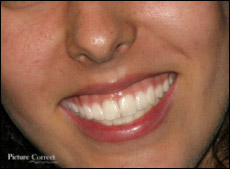
whiten-teeth2Photoshop is the dream machine for all photo enhancers and designers. Not only can you make any portrait look perfect, you can do it easily and convincingly… once you know how.

This article will show you, for example, how to whiten teeth and eyes using Photoshop. Some of the more complicated techniques will be over the head for the novice, but you’ll be able to follow most of it. So drag a portrait into whatever Photoshop program you have, and let’s get started:

It’s always a good idea to make a new layer, an exact duplicate, of your photo before you ever start the enhancement process. That way, if you decide you need to undo several steps, you’ll always be able to quickly undo.

Click “Layer” in the horizontal menu bar, click “Duplicate Layer,” then click “Ok.” Onward to the teeth-whitening.

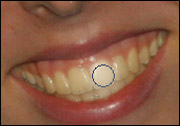
The easiest way to make teeth whiter in a photo is with your Dodge Tool. (Among your tool icons, it’s the 7th down on the right hand column. If you don’t see it there, right click on the icon and you’ll find two hidden choices; one will be your Dodge Tool.)

whiten-teeth3On the horizontal Tool Options Bar under the Menu, choose “Midtones” for Range, and 40% for Exposure. Also on the Tool Options Bar, choose the appropriate brush for this particular retouching job.

Use your Magnifying Glass Icon in Tools to zoom in to the area you want to affect. Then run your brush over the teeth you want to whiten several times, slowly, without releasing your mouse.

If you find that the Dodge tool whitened too much, you can either click “Edit,” then “Step Backward,” (to start over), or “Edit”, then “Fade Dodge Tool,” which will allow you to fade the whitening enhancement to your exact preference.

The Dodge tool can also be used to whiten the whites of the eyes, and, in general for anything you want to lighten. Used with discretion, it’s quite a handy tool.
whiten-teethIn Photoshop, there are always a number of methods to accomplish the same thing. Another way to whiten teeth would be the following:

Select the teet with your Lasso tool icon, (second down on the left in your Tools). Then click on Image in your Menu, Adjustments, and Curves. Make sure the Channel box says RGB. Then, with your mouse, pick up the top right-hand corner of the box and drag the line over to the left. You will be able to watch the whitening process as you go.

You can use the Curves tool to change color on any given selection, too.

Photoshop is such a powerful program that it behooves any serious photographer to get familiar with at least the basics.


Source


Happy enhancing!

Tuesday, February 28, 2012

Restoring old portraits . . .

Restoring Old Photographs for Digital Printing
Written by Mark Roberts

No photo is too old or too damaged to reproduce in a digital format for graphics oriented projects.
For many sign shops, digital printing technology has opened numerous new doors for additional projects. Huge, impressive digital prints (cost-prohibitive a few years ago) are now within the price range of most progressive business owners and advertising buyers.

Photo 1
Photo 2

Photo 3

Photo 4

Photo 5

Photo 6

Photo 7

Photo 8

Photo 9

Photo 10

Photo 11

Photo 12
The market for retail point-of-sale products – such as suspended digital banners and wall wraps – will continue to grow at a staggering pace. But will you get your fair share? You will, if you offer services the average sign company may not offer.


For example, let’s examine a great technique that can be used to repair and restore old and/or damaged photos for digital print reproduction. Personally I’ve never attempted a photo restoration before, so we’ll be learning the steps together this month.


I’m using a photograph of my great grandparents, which was taken in the late 1800s (Photo 1). As you can see, the photo has lost a tremendous amount of detail. Some of the detail can be enhanced, while some of the detail will have to be recreated.


I like to work large, so I scanned the photograph at 1000-dpi in full RGB (Red-Green-Blue) color. So why scan a black-and-white photo in RGB color? Read on. You’ll see.


My favorite design tool is Adobe Photoshop™.In fact, all of my digital print projects begin in Adobe Photoshop before being sent to VersaWorks™ for outputting. After opening the image in Adobe Photoshop (Photo 2), I immediately create a copy, name it “safe copy,” and then hide it from view. This is a great way to have a safety net when working in Adobe Photoshop, and I highly recommend it. As you work, you can create new “safe copies” and delete the old ones.


Now that I’m viewing the image on the screen, I opened the color channels tab and began working the sliders. I adjusted the red channel, the green channel, and the blue channel, until I found the right amount of contrast (Photo 3). When I like what I see, I save a copy in that setting; then I save a new backup copy with the same settings, as I delete the old copies.


The first step involved using the clone tool. I adjusted the tool to the right size and then sampled surrounding areas. With these samples, I filled in the missing areas of the photographs. Samples must be taken as close as possible to the missing areas, so there’ll be little discernable difference in the final product.


The next step is to begin correcting the obvious problems. I noticed in the photo that the right ear was missing from my great grandmother. I’m assuming she did have a right ear, so the easiest way to give her a new ear would be to clone the left ear. I selected the lasso tool and drew a selection around her left ear (Photo 4). Next I made a copy of the selection and created a new layer. Onto that new layer, I pasted the selection and flipped the image horizontally (Photo 5).


Next I positioned the new ear into place and adjusted the rotation so that the ear would look natural. Zooming into see a close-up view, I noticed a discernable line between her face and the cloned ear. I merged the two layers, and using the clone-stamping tool, I removed the line by sampling some of the surrounding areas and pasting these pixels into place over the offending line. For proper feathering, I used the blur brush tool set at 25 percent and stroked the area a few times. This resulted in a seamless ear replacement.


The next part of the project requires squeezing as much detail as possible from the picture. I selected the entire photograph and duplicated the layer (Photo 6). With the new layer situated above the original scanned layer, I went to the layers pallet and chose the “multiply” blend mode for the top layer. Usually this results in an image that is too dark, so I’ll adjust the percentage slider down until I achieve the image I want. Once I was satisfied, I merged the two layers to create a new base layer. I also created new backup copies at this time, deleting the old ones to save space.


The background of the photograph was completely unusable, so I created a layer mask to “paint away” the background. In the “layer mask” mode, I selected round brushes that were sized according to where I was working at the time. In this mode, the paintbrush paints a pink color, which can be lightened to help us see the detail we’re trying to mask (Photo 7). The zoom tool is used extensively in this process, because I want to create the best mask possible that will eliminate all of the background behind the people.


When I was happy with my selection, I pressed the “Q” key. The masked area then became active, which enabled me to delete the selection (Photo 8). (Note: We’ll replace the background later.)


To apply color to the people, I added a new layer above the photo where the color would be enabled. I selected a round paintbrush, and from the color pallet, I selected some flesh tones to paint their faces. The key to painting a black-and-white photo with color is to make sure the layer we’re working on has been set to the “color overlay” mode (Photo 9). This mode allows us to paint on the color in any intensity desired – and the black-and-white detail will show through. Of course, we can vary the hue within the faces, and we should do so around the eyes, the mouth, the sides of the nose, and the ears. Minor hue variations enhance the overall depth of the photo.


After the skin tones had been painted in, I created yet another layer for my great grandfather’s clothes. I selected a brown tone for his jacket and a slightly different hue for his pants. For my great grandmother, I used several different layers to color in the details of her dress, the embroidery on the dress, her jewelry, and her hair color (Photo 10).


The foreground detail revealed a faint image of a fence, which my great grandmother was leaning against while my great grandfather sat in a chair (Photo 11). The detail in the fence was enhanced by painting on yet another layer – which I adjusted for hue, saturation, and color, until achieving the desired look.


The vines and flowers unfortunately were beyond repair. I searched my collection of artwork and found a suitable replacement, which I imported and placed into position. Using the saturation slider, I adjusted the image to fade it and mute the colors.


For the open background behind my great grandparents, I found a suitable “Old West” scene in my Clip Art collection and imported it into another new layer. I positioned the new artwork into place and added new layers for colorization. I enhanced the wall panels, the rope, and the jacket hanging on the hook with color.


When I was absolutely satisfied with the image, I saved the entire file one last time with all layers intact; I then saved it again with all layers merged with a new name. By saving the project with all layers intact with a different name than the file we’ll use for printing, we can always revert to the original files if any adjustments are necessary. (Note:You won ’t be able to do that once all the layers are merged, so keep this in mind when working with any original file creations.)


After more than three hours, I had an image worthy of printing. My image was still at 1000-dpi, and there’s a good reason for that. My intentions for this project was to create a large portrait for framing, so I resized the image to 300-dpi. The resulting dimensions came out to roughly 11-by-17 inches, which was my desired size.


I saved the file in the TIFF format and imported it into the Roland VersaWorks program. Inside VersaWorks, I added the file to “Job Que A,” and then (inside the “settings” tab), I specified four prints with perimeter cutting (Photo 12). After a few seconds of RIPping, the VersaCamm began printing four beautiful, full-color prints of a restored photograph that’s well over one hundred years old.


I made four prints—one for my brother, one for my sister, and one for me. And the fourth print? It was a gift to my father for his eightieth birthday. I framed his print and presented it to him on his birthday (Photo 13). Needless to say, he was impressed.


Photo restoration can be an additional profit center for your sign business. Many times, our clients have photos they want produced on banners and signs that may seem unusable, but we can fix them – for a nice fee – once we learn the tricks. Practice on some of your own old photographs and you’ll be amazed at the results.

Source


Sunday, February 19, 2012

How To Remove Dust Spots From Multiple Photos in 4 Steps

How To Remove Dust Spots From Multiple Photos in 4 Steps


Dust. The eternal enemy of a digital camera. When you shoot pictures with a digital SLR camera long enough, you will come to know the pain that dust can cause. For some it’s a minor annoyance. For others, it costs time and money attempting to salvage vital images.
In this post Peter Carey shares some tips on how to remove dust spots from multiple photos.
With advancements in DLSRs has also come advancements in Photoshop tools to remove dust. My favorite for dust removal, partially because of its price, is Photoshop Lightroom. While it is a scaled down version of the full blown Photoshop, it is perfectly suited to remove 90% of the dust I encounter.
Why is dust such a problem? Take a look at the picture on the left. Do you notice the small black spots in the sky and one big spot on the left side in the mountain? Those are not UFOs and that is not a mining tunnel. It was dust adhered to the sensor, casting a black shadow on the sensor when the shutter was activated. You can’t get back the data that is covered over by the shadow, but you can get creative and repair the damage depending on the dust location. When those dust spots are in the same location on each image, you’re in luck as there is a fairly easy method for multiple photo dust spot removal. (Note: the instructions are given using a PC version of Lightroom 1.4. Mac instructions vary only slightly if using a single button mouse)

Read more . . .

Monday, January 2, 2012

Stock Photography

"If I sell my photos online, how much might I earn through microstock photography?" A good question. I'll give you an overview of how much you could earn, but first lets clarify: Microstock photography is not a get rich quick scheme. It will take dedication and a great deal of hard work and time to build up a microstock portfolio large enough to enable you to quit your day job.

By far the best aspect of microstock photography, besides the fun factor, is that you will sell photos online and earn you money every month, regardless of whether you work or not. Your best photos may continue to sell well for decades.

It is impossible to predict how much each individual will earn through microstock photography, because our photos are all so very different. Yes, you could be earning several thousand dollars every month having worked part time for just a year, or a great deal more (or less). You will get out exactly what you put in.

Earnings are based on two obvious factors.

1) The amount of time you invest in microstock photography
2) The quality and saleability of your stock photos, which is key.

I began microstock photogaphy as a part time hobby, shooting occasionally at the weekends, and after just a few months my monthly income selling photos at shutterstock alone had grown to over $200! My monthly income would have been greater if I had sold my photos online via other microstock photography sites, and greater still if had been shooting more often. At any time, if I stopped to focus on microstock photogaphy full time for just one month, I am sure I could easily increase my monthly income by several hundred dollars.

The rule of thumb is one dollar, per image, per month. Selling photos online with a portfolio of 4,000 images one 'might' earn $4,000 per month. In theory, if you created 11 new microstock photos daily, you would have 4000 photos within a year. If you were to earn $4k a month from 4k photos, your photos would all need to be:
    Saleable: Some photos do not sell well, others sell like hot cakes.
    Technically good: A percentage of the photos you submit will be rejected. My best batch acceptance was 79/80 photos at shutterstock. Shooting under studio lighting gives more consistent results. Uploaded to multiple stock web sites: If you hope to earn "one dollar per image per month" you will need to upload your photos to several of the busiest and most lucrative microstock websites. You will not earn one dollar per image per month by uploading to just one micro stock web site, unless your images are exceedinly saleable.
I know microstock photographers who have been shooting stock part time for just one year, who are now earning thousands of dollars every month. I know photographers who have earned $50 after their first few days with their first few batch uploads, and I know even more photographers who have not.

 Have a look here to see which types of images sell best.

The top professional 'traditional stock' photographers earn tens of thousands of dollars per month, fly models to exotic locations, and make good money because they are exceptionally good at what they do. They are not the norm, though.

There is one microstock website which seems to generate substantially more income than any other of the microstock websites, and that site is Shutterstock. I recommend that every microstock photographer submit images there. To get accepted as a contributer, you will need to have 7/10 images approved by their photo reviewers, or face a brief suspension of your account. Sign up now, then read the various sections on this website before submitting your first batch of 10 images. Your photos will need to be clean and free of noise, and should be keyworded appropriately so that buyers can find them.

Most photographers are photographers for life. If you dont have much spare time for microstock phtography today, you could still start now by building your portfolio slowly. Start today. You may look back in years to come and be glad you did.

One 'Great' stock photo will generate far more money than a fifty 'good' stock photos. The amount of high quality microstock photos on the market increases by tens of thousands per month. As time passes, you will need to improve if you want your future photos to sell as well as your current photos do today.

With dedication you will improve. To sell photos of burgers, you dont need to take "the best photo of a burger in the whole wide world" but you should aim to create stock photos which are better than the average burger photos currently available. To win a horse race, one doesnt need to run twice as far or twice as hard as the other riders - one simply needs to be a nose ahead when crossing the finish line.
The more stock photos you sell, the more you will learn about which types of photos sell well, and which ones do not. If you are dedicated to making a success of microstock photography, you are only going to improve, and reap ever greater levels of photographic and monetary reward.

Then, there are the older photographers, the people who are towards the end of their careers who have been taking photos for decades. I know photographers who have over 100'000 slides and negatives, and are doing nothing with them. I also know photographers who have vast collections of work who have realised they are sitting on a potential fortune, who employ people to clean, keyword and upload their photos for them. Do you fall into either category?

Both Shutterstock and Fotolia are great microstock photography websites, shutterstock will earn you the most money, but both are good places to start.

Source