Restoring Old Photographs for Digital Printing
Written by
Mark Roberts
No photo is too old or too damaged to reproduce in a digital format for graphics oriented projects.
For many sign shops, digital printing technology has opened numerous new doors for additional projects. Huge, impressive digital prints (cost-prohibitive a few years ago) are now within the price range of most progressive business owners and advertising buyers.
 Photo 1 |
 Photo 2 |
 Photo 3 |
 Photo 4 |
 Photo 5 |
 Photo 6 |
 Photo 7 |
 Photo 8 |
 Photo 9 |
 Photo 10 |
 Photo 11 |
 Photo 12 |
The market for retail point-of-sale products – such as suspended digital banners and wall wraps – will continue to grow at a staggering pace. But will you get your fair share? You will, if you offer services the average sign company may not offer.
For example, let’s examine a great technique that can be used to repair and restore old and/or damaged photos for digital print reproduction. Personally I’ve never attempted a photo restoration before, so we’ll be learning the steps together this month.
I’m using a photograph of my great grandparents, which was taken in the late 1800s (Photo 1). As you can see, the photo has lost a tremendous amount of detail. Some of the detail can be enhanced, while some of the detail will have to be recreated.
I like to work large, so I scanned the photograph at 1000-dpi in full RGB (Red-Green-Blue) color. So why scan a black-and-white photo in RGB color? Read on. You’ll see.
My favorite design tool is Adobe Photoshop™.In fact, all of my digital print projects begin in Adobe Photoshop before being sent to VersaWorks™ for outputting. After opening the image in Adobe Photoshop (Photo 2), I immediately create a copy, name it “safe copy,” and then hide it from view. This is a great way to have a safety net when working in Adobe Photoshop, and I highly recommend it. As you work, you can create new “safe copies” and delete the old ones.
Now that I’m viewing the image on the screen, I opened the color channels tab and began working the sliders. I adjusted the red channel, the green channel, and the blue channel, until I found the right amount of contrast (Photo 3). When I like what I see, I save a copy in that setting; then I save a new backup copy with the same settings, as I delete the old copies.
The first step involved using the clone tool. I adjusted the tool to the right size and then sampled surrounding areas. With these samples, I filled in the missing areas of the photographs. Samples must be taken as close as possible to the missing areas, so there’ll be little discernable difference in the final product.
The next step is to begin correcting the obvious problems. I noticed in the photo that the right ear was missing from my great grandmother. I’m assuming she did have a right ear, so the easiest way to give her a new ear would be to clone the left ear. I selected the lasso tool and drew a selection around her left ear (Photo 4). Next I made a copy of the selection and created a new layer. Onto that new layer, I pasted the selection and flipped the image horizontally (Photo 5).
Next I positioned the new ear into place and adjusted the rotation so that the ear would look natural. Zooming into see a close-up view, I noticed a discernable line between her face and the cloned ear. I merged the two layers, and using the clone-stamping tool, I removed the line by sampling some of the surrounding areas and pasting these pixels into place over the offending line. For proper feathering, I used the blur brush tool set at 25 percent and stroked the area a few times. This resulted in a seamless ear replacement.
The next part of the project requires squeezing as much detail as possible from the picture. I selected the entire photograph and duplicated the layer (Photo 6). With the new layer situated above the original scanned layer, I went to the layers pallet and chose the “multiply” blend mode for the top layer. Usually this results in an image that is too dark, so I’ll adjust the percentage slider down until I achieve the image I want. Once I was satisfied, I merged the two layers to create a new base layer. I also created new backup copies at this time, deleting the old ones to save space.
The background of the photograph was completely unusable, so I created a layer mask to “paint away” the background. In the “layer mask” mode, I selected round brushes that were sized according to where I was working at the time. In this mode, the paintbrush paints a pink color, which can be lightened to help us see the detail we’re trying to mask (Photo 7). The zoom tool is used extensively in this process, because I want to create the best mask possible that will eliminate all of the background behind the people.
When I was happy with my selection, I pressed the “Q” key. The masked area then became active, which enabled me to delete the selection (Photo 8). (Note: We’ll replace the background later.)
To apply color to the people, I added a new layer above the photo where the color would be enabled. I selected a round paintbrush, and from the color pallet, I selected some flesh tones to paint their faces. The key to painting a black-and-white photo with color is to make sure the layer we’re working on has been set to the “color overlay” mode (Photo 9). This mode allows us to paint on the color in any intensity desired – and the black-and-white detail will show through. Of course, we can vary the hue within the faces, and we should do so around the eyes, the mouth, the sides of the nose, and the ears. Minor hue variations enhance the overall depth of the photo.
After the skin tones had been painted in, I created yet another layer for my great grandfather’s clothes. I selected a brown tone for his jacket and a slightly different hue for his pants. For my great grandmother, I used several different layers to color in the details of her dress, the embroidery on the dress, her jewelry, and her hair color (Photo 10).
The foreground detail revealed a faint image of a fence, which my great grandmother was leaning against while my great grandfather sat in a chair (Photo 11). The detail in the fence was enhanced by painting on yet another layer – which I adjusted for hue, saturation, and color, until achieving the desired look.
The vines and flowers unfortunately were beyond repair. I searched my collection of artwork and found a suitable replacement, which I imported and placed into position. Using the saturation slider, I adjusted the image to fade it and mute the colors.
For the open background behind my great grandparents, I found a suitable “Old West” scene in my Clip Art collection and imported it into another new layer. I positioned the new artwork into place and added new layers for colorization. I enhanced the wall panels, the rope, and the jacket hanging on the hook with color.
When I was absolutely satisfied with the image, I saved the entire file one last time with all layers intact; I then saved it again with all layers merged with a new name. By saving the project with all layers intact with a different name than the file we’ll use for printing, we can always revert to the original files if any adjustments are necessary. (Note:You won ’t be able to do that once all the layers are merged, so keep this in mind when working with any original file creations.)
After more than three hours, I had an image worthy of printing. My image was still at 1000-dpi, and there’s a good reason for that. My intentions for this project was to create a large portrait for framing, so I resized the image to 300-dpi. The resulting dimensions came out to roughly 11-by-17 inches, which was my desired size.
I saved the file in the TIFF format and imported it into the Roland VersaWorks program. Inside VersaWorks, I added the file to “Job Que A,” and then (inside the “settings” tab), I specified four prints with perimeter cutting (Photo 12). After a few seconds of RIPping, the VersaCamm began printing four beautiful, full-color prints of a restored photograph that’s well over one hundred years old.
I made four prints—one for my brother, one for my sister, and one for me. And the fourth print? It was a gift to my father for his eightieth birthday. I framed his print and presented it to him on his birthday (Photo 13). Needless to say, he was impressed.
Photo restoration can be an additional profit center for your sign business. Many times, our clients have photos they want produced on banners and signs that may seem unusable, but we can fix them – for a nice fee – once we learn the tricks. Practice on some of your own old photographs and you’ll be amazed at the results.
Source
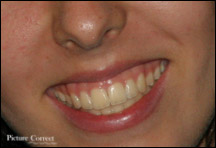 Photoshop is the dream machine for all photo enhancers and designers. Not only can you make any portrait look perfect, you can do it easily and convincingly… once you know how.
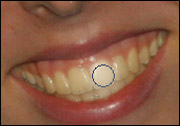 On the horizontal Tool Options Bar under the Menu, choose “Midtones” for Range, and 40% for Exposure. Also on the Tool Options Bar, choose the appropriate brush for this particular retouching job.
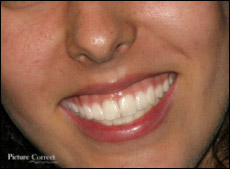 In Photoshop, there are always a number of methods to accomplish the same thing. Another way to whiten teeth would be the following:


