If you would like to submit photography or photo restoration tips to this blog, please email me at KevinRetouch@gmail.com.

We will gladly provide a link to your website or blog along with your contribution.

Wednesday, March 21, 2012

Get your photography noticed online . . .

It’s the Greatest, Easiest, Most Profitable Way To Talk About Your Photography … So Why Aren’t You Doing It?


You’re standing in the checkout line, with several people in front of you. You glance over and start reading the titles of the magazines in front of you. And for some reason they just pull you in.
Do you really care who had an alien baby, or how you can create 365 looks that will make you look more sexy? Maybe … Maybe not.

Yet there is just something about those titles that make you want to pick up the magazine and start reading.

It isn’t a coincidence that the titles are that tantalizing. In fact I’m willing to bet more time is spent on creating those titles and cover layouts then they do writing the stories theselves.

What sells is the title – the sizzle – not the meat of the story. Yes, the story itself has to be good and give you exactly what the title promises. Yet the story satisfies your hunger for whatever information you were promised. You won’t move forward and take action once you’ve read the story.

Because editors know the only way they will stay in business is to get you to buy the magazine, they spend their time on what matters most. The titles.

Now lets convert that over into what you potentially do every week. If you blog, every week you sit down and come up with topics to write about. Yet how much time do you spend coming up with your titles? I know for a lot of you, the answer is “just a few seconds” – and that may even be pushing it.
I see post titles every day that are worded something like this:

Randy and Laurel’s Engagement

Elizabeth’s First Birthday

Jason and Kim’s Wedding Day

Yet what does this do for your business?

When your clients come over and visit your blog, they are a captive audience. They love what you do and chances are they are looking for their own images. I’m sure in the above example Randy and Laurel are thrilled to see their engagement images online, and are passing around the URL to all of their friends and family.

Yet how many people will ultimately see that page? Randy and Laurel – that’s two. Family and friends – we’ll add in another 20. And other clients that may come to the site and decide to look through their images – we’ll add another 50 for long term exposure. That’s 72 in total.

Yet what do these 72 people have in common? Not one of them found any excitement and desire to click on the title from any other method outside of the fact they knew Randy and Laurel. Or had a vested interest in looking at the images.

If you saw Randy and Laurel’s Engagement in Google, would you really click on it?

And more importantly, would you ever look in Google for Randy and Laurel’s Engagement in the first place?

Which means if you are trying to attract new clients, people that have never heard of you yet might want to find you, you have to start thinking like a magazine in the checkout lane. You have to pay attention to your titles and give people the things they are looking for.

How do you know what they are looking for?

The easiest way is head over to Google and use their keyword tool to do a little research.

Let’s get started by typing in the word “photography” just to see what comes up.


When you type in photography, you’ll get many different results. This will show you what people typed directly into Google last month using the keyword you’ve selected. It isn’t a comprehensive list, but should be a great starting point. It will show you search terms as well as worldwide and local results.

From there, you can further refine what keywords you wish to look at. For this example, lets choose the term “wedding photography”.


When you add those words to the search function, your results will come up based on the key phrase instead of one word. In this case everything will be centered around the phrase “wedding photography”. At this point, we’ll further refine our search and look up the term “beach wedding photography”.


After letting the results come up using this phrase, you can see a wide variety of options.


If you are in California, or have the desire to photograph weddings in California, you’ll notice 720 searches were made for “long beach wedding photography” and 390 searches were made for “newport beach wedding photography”.

So if you were showcasing “Jason and Kim’s Wedding” as a blog post title, you may attract a few dozen family and friends to the blog post.

But if you created a blog post title “How Jason and Kim Had Fun With Their Newport Beach

Wedding Photography”, do you think you could attract more attention from a variety of sources … including Google?

If you write hundreds of posts every year, you don’t have to (and shouldn’t) use the same titles over and over again just to attract Google’s attention. But if you think about it first and find a way to make it attractive to both Google and your readers, your posts could quickly help you build up the traffic to your site – and the profits to your business.

Source

Saturday, March 10, 2012

Image sharpening . . .

How to Sharpen Photo without Increasing Noise Visibility

Sometimes it happens that we need to sharpen photos for which there is noise, for example, pictures taken at night. But overall increase in photo sharpness increases and the noise visibility also. How to be in this situation? I can show you one method in Photoshop, how to avoid it.

First of all you should find some appropriate photo to work with.  I prefer to use this one. Open up this photo and start the tutorial. Go to Channel panel (Window > Channels). The first step is to look at the channels palette and determine which color channel best represents the area we want to capture. To the right, shown from top to bottom, you can see the red, blue, and green channels for this image. It’s obvious that the red channel contains the most information because it is most light. Click on the red channel and drag it down to the new channel button to create copy of it.

How to Sharpen Photo without Increasing Noise Visibility 01


We got the copy as you can se on the above picture. Then apply for copied channel Filter > Stylize > Glowing Edges with similar settings to these:


How to Sharpen Photo without Increasing Noise Visibility 02


Now we have effect like this:


How to Sharpen Photo without Increasing Noise Visibility 03


Hold the Ctrl button and click the Red copy thumbnail in the channels palette to load selection of this channel.


How to Sharpen Photo without Increasing Noise Visibility 04


After that we can delete this channel: click on the Red copy channel and drag it down to the delete current channel button to delete it. Then go to layers palette (Window > Layers) and press Ctrl+H to hide selection temporary, but donĂ¢€™t remove selection for now! It is important! Then apply Filter > Sharpen > Unsharp Mask with some suitable presets for the photo. Pay your attention that for each photo presets should be individual. I tried following presets:


How to Sharpen Photo without Increasing Noise Visibility 05


See the result now:


How to Sharpen Photo without Increasing Noise Visibility 06


Now, we have some selected area, but it is hidden for now, press Ctrl+H again to make it visible. Then press Ctrl+J to duplicate selected area to new layer. Then apply Filter > Sharpen > Sharpen Edges:


How to Sharpen Photo without Increasing Noise Visibility 07


That is it for now. We sharpened photo without increasing the noise visibility. Hope, you got some interesting knowledge from this tutorial.


How to Sharpen Photo without Increasing Noise Visibility 08

Source

Thursday, March 1, 2012

Improving your portraits . . .

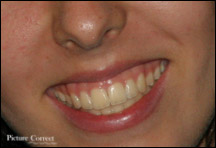
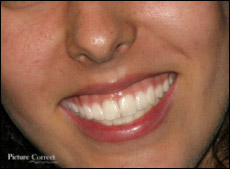
whiten-teeth2Photoshop is the dream machine for all photo enhancers and designers. Not only can you make any portrait look perfect, you can do it easily and convincingly… once you know how.

This article will show you, for example, how to whiten teeth and eyes using Photoshop. Some of the more complicated techniques will be over the head for the novice, but you’ll be able to follow most of it. So drag a portrait into whatever Photoshop program you have, and let’s get started:

It’s always a good idea to make a new layer, an exact duplicate, of your photo before you ever start the enhancement process. That way, if you decide you need to undo several steps, you’ll always be able to quickly undo.

Click “Layer” in the horizontal menu bar, click “Duplicate Layer,” then click “Ok.” Onward to the teeth-whitening.

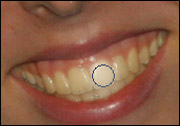
The easiest way to make teeth whiter in a photo is with your Dodge Tool. (Among your tool icons, it’s the 7th down on the right hand column. If you don’t see it there, right click on the icon and you’ll find two hidden choices; one will be your Dodge Tool.)

whiten-teeth3On the horizontal Tool Options Bar under the Menu, choose “Midtones” for Range, and 40% for Exposure. Also on the Tool Options Bar, choose the appropriate brush for this particular retouching job.

Use your Magnifying Glass Icon in Tools to zoom in to the area you want to affect. Then run your brush over the teeth you want to whiten several times, slowly, without releasing your mouse.

If you find that the Dodge tool whitened too much, you can either click “Edit,” then “Step Backward,” (to start over), or “Edit”, then “Fade Dodge Tool,” which will allow you to fade the whitening enhancement to your exact preference.

The Dodge tool can also be used to whiten the whites of the eyes, and, in general for anything you want to lighten. Used with discretion, it’s quite a handy tool.
whiten-teethIn Photoshop, there are always a number of methods to accomplish the same thing. Another way to whiten teeth would be the following:

Select the teet with your Lasso tool icon, (second down on the left in your Tools). Then click on Image in your Menu, Adjustments, and Curves. Make sure the Channel box says RGB. Then, with your mouse, pick up the top right-hand corner of the box and drag the line over to the left. You will be able to watch the whitening process as you go.

You can use the Curves tool to change color on any given selection, too.

Photoshop is such a powerful program that it behooves any serious photographer to get familiar with at least the basics.


Source


Happy enhancing!